How to Grow Avocado Plant from Seed: Easy Gardening Tips
Introduction to Growing Avocado Plants
Growing an avocado plant from seed is a rewarding and straightforward project that can be done right at home, even if you're new to gardening. This blog post will guide you through the entire process, from selecting the perfect avocado seed to enjoying the lush greenery and eventually harvesting your own avocados. By following these simple steps, you'll be able to nurture a healthy avocado plant with ease. We'll start with choosing the healthiest and most viable avocado seeds, ensuring you have the best starting point. You'll learn how to prepare the seed by cleaning and drying it thoroughly and understand the methods for germinating the seed in both water and soil. Next, we'll cover selecting the right pot and soil for optimal growth, as well as the correct way to plant your germinated seed. Proper care tips including watering, sunlight exposure, and pruning will be discussed to keep your plant thriving. We'll also delve into how to manage pests and diseases, fertilize for healthy growth, and transition your plant outdoors. Finally, we'll address common growing problems and provide a timeline for when to expect your first fruit. By the end of this guide, you'll not only have a beautiful avocado plant but also the knowledge to enjoy the fruits of your labor.
Selecting the Perfect Avocado Seed

To ensure you select the healthiest avocado seed, start with a ripe, high-quality avocado. Hass avocados are often recommended due to their robust growth and resilience, but you can experiment with other varieties for different results. According to Greg Alder, an avocado grower and author of "The Agronomist’s Yard," the seed from a perfectly ripe avocado will have the highest germination success rate. Ripe avocados typically have a dark, almost purple-black skin and yield slightly when gently pressed.
Once you've chosen your avocado, it's essential to carefully remove the seed without damaging it. Cut the avocado lengthwise and gently twist the halves apart, then scoop out the seed with a spoon. Be cautious not to nick or cut the seed's outer skin, as this layer is crucial for protecting the inner embryo during germination. According to expert advice from the University of California Agriculture and Natural Resources, even small abrasions can significantly affect germination odds.
After extraction, you need to clean the seed thoroughly, ensuring no fruit residue remains. Rinse under lukewarm water while scrubbing gently with a soft brush or cloth. This step is vital because any leftover fruit can harbor mold or bacteria that hinder the seed's growth. A clean seed also prevents pests and diseases that might otherwise damage the fledgling plant. The Botanical Garden at Smith College reinforces the importance of using clean seeds to ensure the best possible start for your avocado plant.
Finally, determine the seed's orientation for planting by locating the slightly pointed end (top) and the flatter end (bottom). The flatter end is where the roots will emerge, so it must face downward when you start the germination process. Understanding this basic anatomy is key to fostering successful sprouting and strong root development. Gardening experts like those at the Royal Horticultural Society emphasize the importance of this step in preventing common germination frustrations beginners often face.
Preparing the Seed for Planting

To prepare an avocado seed for planting, it’s crucial to start by cleaning it thoroughly. First, remove the seed from the avocado, taking care to ensure that no fruit flesh remains attached. Rinse the seed under lukewarm water, gently scrubbing it with your fingers or a soft brush to remove any residual fruit that could lead to mold. Once cleaned, it's essential to let the seed dry completely. Place it on a windowsill or another well-ventilated area for about 24 to 48 hours. This drying process not only reduces the risk of rot but also helps the seed's outer skin to peel off more easily, which can aid in the germination process.
An important tip when preparing the avocado seed is to decide whether to remove the thin, brown skin on the seed. Some gardeners prefer to peel it off as it can accelerate germination by allowing water to penetrate the seed more effectively. However, this step is optional and not strictly necessary. Regardless, it is vital to ensure that the seed has no blemishes or cracks, as these can interfere with its ability to sprout. With patience and proper care, a well-prepared avocado seed will be primed for successful germination and healthy growth in its early stages.
Germinating the Avocado Seed

To successfully germinate an avocado seed, you first need to decide whether you’ll use the water method or soil method. The water method involves suspending the seed over a glass of water using toothpicks. Pierce the seed with three toothpicks around its circumference and place the wide end down into the glass. Make sure the bottom part of the seed is submerged in water, an expert from The Sill suggests, “change the water every few days to prevent mold.”
Alternatively, the soil method involves directly planting the seed into a small pot filled with well-draining soil. Place the wide end of the seed down and cover with about an inch of soil. Keeping the soil moist but not waterlogged is key; it's a delicate balance, as overwatering can lead to rot, according to gardening enthusiasts at Fine Gardening.
Whether using water or soil, temperature is a crucial factor in germination. Seeds need warmth to sprout, so it’s beneficial to place them in a warm, sunny window. Amy Andrychowicz of Get Busy Gardening notes, “Keeping the seed at a consistent temperature around 60-85°F will encourage successful germination.” Patience is essential, as it can take anywhere from 2 to 8 weeks for a tiny root to emerge.
Once a root system develops, particularly with the water method, it's time to transfer the seed to a pot. Make sure the root is about three inches long before planting. An example of success comes from indoor gardening enthusiasts who’ve seen sprouts appear in just six weeks following these steps meticulously.
In both methods, maintaining consistent moisture levels and keeping a watchful eye out for mold is crucial for successful germination. The viability of the seed is influenced greatly by these conditions, ensuring that the seed develops into a healthy seedling ready for the next growth stage.
Choosing the Right Pot and Soil

Selecting the right pot for your avocado plant is crucial for its growth and development. Choose a pot that is at least 10-12 inches in diameter to provide ample space for the roots to spread. Drainage is equally important; make sure the pot has several drainage holes to prevent water from accumulating at the bottom, which can lead to root rot. A terra cotta pot is often recommended by experts due to its porous nature, allowing for better airflow and moisture control.
When it comes to soil, opt for a well-draining potting mix that is rich in organic matter. Avocado plants prefer slightly acidic to neutral pH levels, ideally around 6-6.5. Experts suggest a mix of equal parts potting soil, compost, and sand to ensure good drainage while retaining sufficient moisture. Anecdotes from experienced gardeners reveal that adding perlite can also enhance soil aeration, promoting healthier root development.
To maximize your avocado plant’s growth, consider adding a slow-release fertilizer to the soil mixture. This provides a steady supply of nutrients over time, ensuring that your plant has everything it needs to thrive. As one seasoned gardener mentioned, “The right soil and pot can make all the difference in how well your avocado plant grows. It’s worth taking the time to get this step right.” With these preparations, your avocado plant will have a solid foundation for healthy growth.
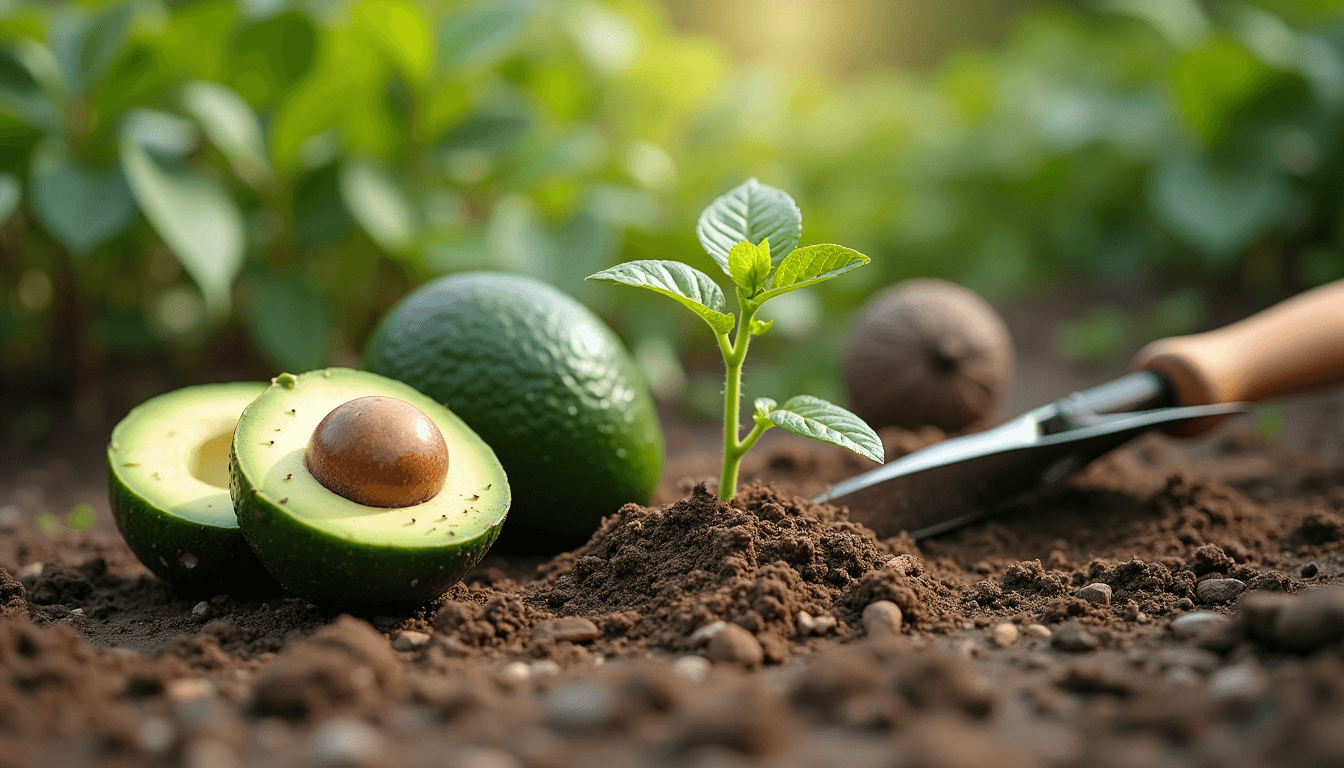
Planting the Germinated Seed

To plant the germinated avocado seed, begin by filling a pot with well-draining soil, preferably a mix of potting soil and compost. Make sure the pot is at least 10 inches in diameter to give roots ample space to grow. Place the pit in the soil with the root side down and the pointed end just above the soil surface. This position ensures that the new sprout will have room to grow upward.
Next, gently cover the lower half of the seed with soil while leaving the top half exposed. This mimics the way avocado seeds would naturally start to grow if planted outdoors. Lightly pat the soil around the seed to ensure it's stable, but avoid compacting it too much as this can hinder root development. Water the soil until it's evenly moist, but be cautious not to oversaturate to prevent root rot.
Position the pot in a location with plenty of bright, indirect sunlight. A windowsill facing south or west often provides the ideal amount of light. If you notice the seedling leaning towards the light, rotate the pot to encourage even growth. Depending on your home's humidity levels, you may need to mist the soil occasionally to maintain the right moisture level for the young plant.
In the early stages, monitor your seedling's growth and adjust your care routine as needed. If the soil dries out quickly, consider placing a humidity tray nearby or using a room humidifier. With proper care, the little seedling will develop into a robust avocado plant, eventually ready to be transitioned to an outdoor setting or a larger pot.
Watering Your Avocado Plant

To keep your avocado plant thriving, it's essential to water it correctly, balancing moisture without causing waterlogged conditions. Avocado plants enjoy well-drained soil, but they require consistent hydration to support their growth. It's best to water your plant thoroughly and then allow the soil to dry slightly before watering again. A good practice is to check the top inch of soil; if it feels dry to the touch, it's time to water. Overwatering can lead to root rot, a common issue that can jeopardize the health of your plant. According to gardening expert Joe Lamp'l, "avocado plants need regular water, but soggy soil is a killer." To avoid this, ensure your pot has proper drainage holes, and consider using a moisture meter to get accurate readings. Observing your plant's leaves can also give you clues about its water needs; wilting might indicate under-watering, while yellowing leaves could suggest overwatering.
Providing Adequate Sunlight

To ensure your avocado plant thrives, it's crucial to provide adequate sunlight. Avocado plants require at least 6 to 8 hours of direct sunlight daily for optimal growth. Place your potted plant near a south-facing window if growing indoors, where it can soak up the most sunlight. If you notice the plant leaning or stretching towards the light source, rotate the pot every few days to promote even growth. Inadequate sunlight may lead to leggy growth, where the plant stretches out and becomes weak, so consistent, ample sunlight is essential.
If you're growing the plant outdoors, choose a location with full sun exposure. Leaf burn can occur in areas with extremely hot climates, so consider providing partial shade during peak afternoon hours. According to gardening expert Jessica Walliser, "Avocados thrive best in full sun but can tolerate a bit of shade in the hottest parts of the day." Keeping an eye on your plant's leaves will help; yellowing or browning leaves can be a sign that the plant needs either more sunlight or protection from overly harsh rays.
Pruning Your Avocado Plant

Pruning your avocado plant is essential for encouraging a robust, bushier growth. Begin by pinching off the top leaves once your plant reaches about 12 inches in height. This will prompt the plant to focus energy on side shoots, leading to a fuller appearance. According to horticulturist Ron Smith, "Pruning young avocado plants helps them develop a balanced structure, preventing legginess."
Regularly removing dead or damaged branches helps maintain plant health, reducing the risk of diseases and infestations. For instance, prune away any yellowing leaves or branches with signs of fungus to prevent these issues from spreading. If your plant's branches start crossing, thinning them out ensures better air circulation, which is crucial for overall vitality.
To achieve optimal results, prune your avocado plant in late winter or early spring when it's not actively growing. This timing minimizes stress on the plant and promotes recovery. Always use clean, sharp pruning shears to make precise cuts, and sanitize your tools between uses to avoid introducing infections. With attentive care, your avocado plant will thrive, setting it up for a healthy, productive future.
Managing Pests and Diseases
To keep your avocado plant thriving, manage pests and diseases carefully by inspecting it regularly for signs of common pests like spider mites, aphids, and erwinia. Using insecticidal soap can effectively control minor infestations, but for more serious problems, consider introducing beneficial insects like ladybugs. Diseases such as root rot often result from overwatering, so ensure your soil drains well and avoid waterlogging the roots. If fungal infections appear, remove affected leaves promptly and apply a fungicide to prevent the spread. Moreover, anecdotal evidence from seasoned gardeners suggests rotating your plant occasionally to discourage pest colonization on any particular side. Remember, attentive care is crucial; even slight negligence can lead to significant plant health problems.
Fertilizing for Healthy Growth

Use a balanced fertilizer with a ratio of 10-10-10 to provide essential nutrients for your avocado plant. Experts recommend fertilizing every 4 to 6 weeks during the growing season, from spring to early fall. According to the University of Florida, avocado trees benefit most from a slow-release fertilizer that can provide sustained nutrition.
For young avocado plants, using a diluted liquid fertilizer can prevent over-fertilization and potential root burn. Additionally, incorporating organic compost enriches the soil and promotes root health.
To boost nitrogen levels, which is crucial for leaf development, consider using fish emulsion or blood meal. These organic options are particularly effective in the early stages of growth.
Monitor the plant’s response to fertilizer carefully. Yellowing leaves or leaf drop can indicate nutrient deficiencies or over-fertilization. Adjust the frequency and type of fertilizer based on these signs.
Always water the plant thoroughly after applying fertilizer. This ensures the nutrients reach the roots and minimizes the risk of fertilizer burn. Following these tips will help you grow a healthy and vibrant avocado plant.
Transferring to Outdoors

Before you transfer your avocado plant to an outdoor setting, it's crucial to ensure the last frost has passed, as young plants are particularly susceptible to cold damage. Gradually acclimatize the plant to outdoor conditions by setting it out for increasingly longer periods each day over a span of one to two weeks. This method, known as hardening off, helps the plant adjust without experiencing shock.
Select a well-draining spot in your garden that receives partial sunlight for optimal growth. Consider wind protection, as avocado plants can be sensitive to strong gusts. A location near a south-facing wall often creates a favorable microclimate. Before planting, amend the soil with organic compost to foster a nutrient-rich environment that can support robust root development.
When positioning the plant, dig a hole twice as wide as the root ball but slightly shallower, allowing the top of the root ball to sit above the soil level to prevent rot. Water thoroughly post-planting and add a layer of mulch around the base to maintain moisture and regulate soil temperature. Regularly monitor for wind damage and pest invasions, acting promptly to ensure your avocado plant thrives in its new outdoor home.
Common Growing Problems Solved

To tackle issues like leaf drop, ensure your avocado plant is neither overwatered nor exposed to drafts, both of which can stress the plant. Experts from the University of California recommend maintaining stable moisture in the soil and shielding the plant from sudden temperature changes. Address yellowing leaves by checking nutrient levels; a deficiency in nitrogen or iron could be the culprit. Consider using a well-balanced fertilizer to remedy this issue.
For slow growth, it's crucial to evaluate the soil quality and drainage, as avocados dislike overly wet soil. Roy Sakaki, a horticulturist, emphasizes the importance of loose and well-draining soil to promote root health. Additionally, ensure your plant receives adequate sunlight—at least six hours daily—as insufficient sunlight can stunt growth.
When to Expect Your First Fruit

Expecting your first avocado fruit requires patience. Typically, an avocado tree grown from seed can take anywhere from 5 to 13 years to produce fruit. This timeline depends on various factors including the growing conditions, care provided, and even the avocado variety.
Look for signs such as healthy growth patterns and the development of flowers. The production of flowers is a positive indicator that your avocado plant might soon bear fruit, but not all flowers will necessarily result in fruit.
Concrete examples include ensuring the tree gets ample sunlight and proper fertilization, as these factors significantly impact its growth and fruit-bearing capacity. Reliable sources like the University of California’s Agriculture and Natural Resources department suggest consistent care for optimal results.
Each plant's journey to fruiting can differ, as some may bear fruit earlier than others. Remember, patience and attentive care are key in nurturing your avocado plant to fruition, emphasizing the reward that comes with diligence and time.
Conclusion: Enjoying Your Avocado Tree

Cultivating your own avocado tree is a deeply rewarding experience, bringing both aesthetic pleasure and the satisfaction of nurturing a plant from seed to maturity. Imagine the joy of harvesting avocados from a tree you grew with your own hands. Remember the key steps: select a viable seed, germinate it properly, provide the right conditions for growth, and address any challenges along the way. With patience and care, your avocado tree will flourish, serving as a testament to your dedication and gardening skills.
Meta Description: Learn how to grow avocado plants from seed with these easy gardening tips. Enjoy fresh avocados from your own tree!
Meta Keywords: how to grow avocado plant from seed, avocado gardening tips, growing avocado plant, avocado tree care
Sources:
gardeningknowhow.com
thespruce.com
almanac.com