How to Grow Garlic: A Beginner’s Guide to Homegrown Garlic
Introduction to Growing Garlic
Embarking on the journey of how to grow garlic at home can be both rewarding and enriching. Growing your own garlic allows you to enjoy fresh, flavorful bulbs that can transform your culinary creations. Imagine the difference in taste and quality when you use homegrown garlic to elevate your favorite dishes.
Garlic comes in various types, each with its unique characteristics. Some varieties are well-suited for colder climates, while others thrive in milder conditions. Understanding these differences is crucial for a successful harvest and helps you select the right type for your garden.
Growing garlic involves a series of straightforward steps. You'll start by preparing your garden soil and choosing the appropriate garlic variety. From planting cloves to nurturing the plants as they grow, and finally harvesting the bulbs, each step is essential. We'll guide you through this process to ensure your garlic garden flourishes.
In this guide, we'll walk you through everything you need to know, starting with selecting the right garlic variety for your region, to preparing your garden bed and ensuring optimal growth conditions. We'll also cover the crucial aspects of harvesting and storing your garlic to keep it fresh for months.
Whether you're a seasoned gardener or a beginner, this comprehensive guide will provide you with the knowledge and confidence needed to grow your own garlic successfully. Let's dive into the world of homegrown garlic and discover how this humble plant can enhance your garden and your kitchen.
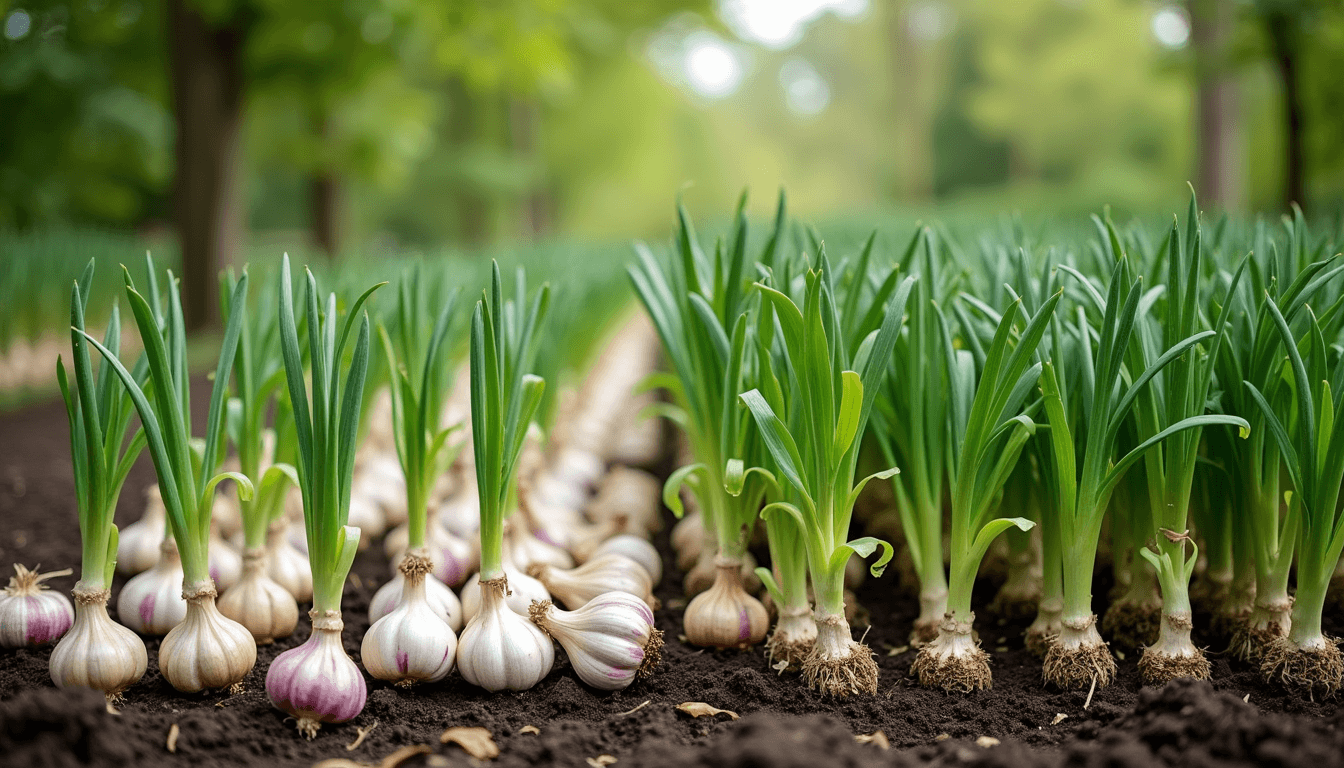
Choosing the Right Garlic Varieties

Differentiating between softneck and hardneck garlic is crucial for choosing the right variety for your garden. Softneck garlic is prized for its longer shelf life and adaptability to a wider range of climates, making it suitable for gardeners in warmer regions. On the other hand, hardneck garlic varieties are known for their robust flavor and are better suited for colder climates, as they require a period of vernalization—exposure to cold temperatures—to develop properly. Besides climate adaptability, the choice between the two types also depends on culinary preferences; for example, hardneck garlic often produces larger cloves that are easier to peel, which is beneficial for frequent cooks.
Other key factors to consider include soil type and specific growing conditions. Garlic thrives in well-draining soil with a slightly acidic to neutral pH, ideally between 6.0 and 7.0. It's essential to test your soil and amend it with compost or organic matter to achieve optimal growing conditions. Moreover, selecting varieties that are suited to local conditions can significantly increase your chances of a successful harvest. For example, 'California Early' softneck garlic is a great choice for mild climates, while 'German Red' hardneck garlic performs well in colder areas. Considering these factors will help you choose the right garlic varieties, ensuring a bountiful and flavorful harvest.
Preparing Your Garden Soil

Garlic thrives in well-draining soil as it cannot tolerate waterlogged conditions. To start, ensure that your garden soil has good drainage, perhaps by embedding organic matter like compost or well-rotted manure. This creates a loose, friable soil structure that allows roots to penetrate easily and prevents water from pooling around the garlic bulbs. According to the University of California's Agriculture and Natural Resources division, compost can improve soil texture and fertility, which is crucial for garlic's growth.
Testing the pH of your soil is a critical step in preparation. Garlic prefers slightly acidic to neutral soil, with a pH range of 6.0 to 7.0. You can purchase a simple pH testing kit from a garden center to check your soil. If the pH is too low, consider adding lime to raise it; if it's too high, sulfur might be required to lower it. "Proper pH balance ensures that garlic absorbs nutrients efficiently," says horticulturist Julie Thompson-Adolf.
Enhance soil fertility by adding compost or aged manure, which enriches the soil with essential nutrients like nitrogen, phosphorus, and potassium. Garlic is a heavy feeder, and providing it with nutrient-rich soil from the get-go sets the stage for robust growth. According to the National Gardening Association, well-prepared soil can drastically improve crop yield and quality.
Finally, ensure the soil is tilled and free from large clumps or stones that could hinder bulb development. Loosen the soil to a depth of at least 12 inches to provide ample room for the garlic roots to expand. A fine, crumbly texture is ideal, as it ensures that the garlic cloves establish themselves quickly and uniformly.
When to Plant Garlic

Garlic is typically planted during the fall in most regions of the United States, usually from late September to early November. This allows the cloves to establish roots before the ground freezes, ensuring a strong start come spring. However, in milder climates, such as those found in Southern states, you can also opt for a spring planting. In these areas, gardeners often plant garlic in late winter to early spring, ensuring the soil is workable and temperatures are just right for growth.
One of the key factors to consider when timing your garlic planting is the concept of chill hours. Chill hours refer to the cumulative number of hours of cold temperatures (below 40°F) that garlic needs to develop healthy, well-formed bulbs. Most garlic varieties require a minimum of 40 to 60 chill hours to break their dormancy and trigger bulb formation. Cold exposure during the early stages of growth not only supports vigorous root development but also encourages the differentiation of large bulbs.
Despite the variance in planting times across different regions, the overarching goal remains the same: ensuring your garlic cloves experience enough cold weather to thrive. For instance, if you’re planting garlic in a northern region with cold winters, fall planting is ideal. Conversely, garlic varieties like softneck, which are more suited to warmer climates, benefit from being planted in late winter. By understanding these regional and varietal differences, you can optimize your garlic planting schedule for a bountiful harvest.
Planting Garlic Cloves

To begin planting garlic cloves, first, break apart the garlic bulbs into individual cloves, ensuring you keep the papery skin intact. This protective layer safeguards the clove during the initial stages of growth. Plant only the largest and healthiest cloves, as these will produce the most robust bulbs.
Next, plant each clove with the pointed end facing up and the flat end down. This positioning ensures the roots grow downward and the sprout moves upward, essential for healthy development. The cloves should be planted about 2 inches deep to protect them from frost and other environmental factors.
Proper spacing is crucial for garlic to thrive. Plant cloves approximately 4-6 inches apart in rows about 12 inches apart. This spacing provides enough room for each plant to access adequate nutrients and water, reducing competition and promoting healthy bulb growth.
After planting, water the garlic thoroughly to help establish strong roots. Maintain consistent moisture without waterlogging the soil to avoid rot. Garlic needs about an inch of water per week, especially during dry spells, to support its rapid growth phase.
Finally, cover the planted cloves with a layer of mulch, such as straw or shredded leaves, to protect them from frost and suppress weed growth. Mulching also helps retain soil moisture and maintain an even temperature, creating an optimal environment for garlic cloves to thrive. Sources like The Old Farmer's Almanac can provide additional insight into these practices (Old Farmer's Almanac).
Watering and Fertilizing Garlic

Ensuring garlic gets consistent watering is crucial for healthy growth, but overwatering can be detrimental, leading to waterlogged soil and root rot. It's best to water garlic deeply once a week, allowing the soil to dry slightly between watering sessions. Monitoring soil moisture levels can help you achieve this balance. Using a soil moisture meter or simply digging a few inches into the soil with your fingers can provide a good indication of moisture levels.
Selecting the right fertilizer is also key. Garlic generally thrives with a balanced fertilizer, such as a 10-10-10 blend, applied at planting and mid-season. Compost or well-rotted manure can provide organic alternatives, enriching the soil with essential nutrients. Additionally, fertilizing with high-nitrogen options early in the season can promote vigorous leaf growth. Garlic's nutrient needs are relatively modest compared to other crops, but a steady supply of nutrients ensures robust bulb development.
During the growing season, it's important to apply fertilizers judiciously. Early applications should focus on nitrogen-rich options to support foliage growth. As the season progresses and bulb formation begins, shifting to a balanced or even potassium-focused fertilizer can enhance bulb size and quality. Avoid high nitrogen later in the season to prevent excessive leaf growth at the expense of bulb development.
Real-world examples and expert insights underscore these practices. Experienced growers often share tips about using seaweed extract or fish emulsion for a nutrient boost. According to the University of California's Agriculture and Natural Resources division, consistent but moderate fertilization fosters healthier plants and better yields. Following these guidelines can help beginners achieve success with their homegrown garlic.
Mulching for Weed and Frost Protection

Mulching is crucial for both weed suppression and frost protection in garlic cultivation. By applying a thick layer of organic mulch such as straw or shredded leaves around the garlic plants, you create a barrier that prevents light from reaching the soil surface, inhibiting weed growth. Weeds compete with garlic for nutrients and water, so keeping them under control is essential for healthy plant development. This not only reduces the need for frequent weeding but also saves time and effort throughout the growing season.
In addition to weed control, mulch plays a significant role in protecting garlic from extreme weather changes, particularly frost. Garlic is typically planted in the fall, which means it can be exposed to cold winter temperatures. A thick mulch layer acts as an insulator, maintaining a more consistent soil temperature and preventing the garlic cloves from freezing. This insulation ensures that garlic plants emerge strong and healthy in the spring, ready for optimal growth.
Applying mulch correctly involves spreading a 3-4 inch layer around the plants, ensuring it covers the entire growing area without touching the garlic shoots directly. Organic mulch materials, such as straw and leaves, decompose over time, enriching the soil with valuable nutrients. This decomposition improves soil structure and fertility, providing a better growing environment for the garlic. Regularly replenishing the mulch as it breaks down ensures continued benefits throughout the garlic's growth cycle.
Managing Garlic Pests and Diseases

Garlic plants can be susceptible to various pests and diseases that may compromise their growth and yield. Common pests include aphids, onion maggots, and nematodes, which can cause stunted growth and bulb damage. To manage these pests organically, introducing beneficial insects like ladybugs can control aphid populations, while crop rotation and planting disease-resistant varieties help reduce nematode infestations. For chemical solutions, insecticidal soaps and neem oil are effective but should be used sparingly and as a last resort to avoid harming beneficial insects.
Diseases such as white rot, downy mildew, and rust can severely impact garlic plants. White rot, caused by soil-borne fungi, can be minimized by avoiding previously infected soil and ensuring good drainage. Downy mildew thrives in wet, humid conditions, so improving air circulation and reducing overhead watering can mitigate its spread. As for rust, which presents as orange spots on leaves, applying sulfur-based fungicides early in the season and removing infected plant debris can effectively manage this issue. Regular monitoring and maintaining healthy growing conditions are critical to keeping garlic plants in optimal condition.
Understanding Garlic Growth Stages

Garlic growth follows several stages, each critical for a successful harvest. Initially, garlic cloves sprout about 4–6 weeks after planting, transforming into green shoots that signal healthy initial growth. During this time, it's important to monitor the soil's moisture levels, as consistent moisture is crucial for strong sprout development.
As the plants mature, they move into the bulbing stage, typically around early summer. In this phase, the garlic’s energy shifts from leaf production to bulb formation. Look for foliage that begins to yellow and die back, an indication that the plant is redirecting its nutrients to the garlic cloves. Maintaining optimal soil nutrients and slightly reducing watering can encourage robust bulb growth.
Finally, the maturation and hardening stage occurs when the bulbs reach their full size. At this point, the outer leaves of the garlic plants continue to yellow and dry out, a key indicator that harvesting time is near. It's essential to harvest before the foliage completely dies in order to prevent the bulbs from splitting and ensure they store well.
Harvesting Your Garlic

Look for the lower leaves to start yellowing and drying out while the upper leaves remain green; this signals that your garlic is ready for harvest. Use a gardening fork to gently loosen the soil around the bulbs, taking care not to puncture or damage them. Gently pull out the bulbs by the stalks without twisting or cutting, as any injuries can invite decay during storage. After removing the garlic from the soil, immediately brush off the loose dirt but do not wash the bulbs.
Drying and Curing Garlic

Proper drying and curing are essential steps to ensure your garlic is ready for long-term storage. Once harvested, gently brush off any soil from the bulbs without removing too many layers of the papery skin. Hang the bulbs in a cool, dry, and well-ventilated area, like a garage or shed, ensuring they are spaced well apart to prevent mold. Use a herb-drying rack or tie them in small bundles to hang from beams or hooks.
The environment plays a crucial role in successful curing. Aim for temperatures around 60-70°F and low humidity. Allow the garlic to cure for about three to four weeks. During this period, the bulbs will continue to dry, and their wrappers will tighten, which is key for protecting the cloves in storage. Be mindful of checking periodically for any signs of mold or rot and remove affected bulbs immediately.
Once cured, the garlic is ready for trimming and storage. Cut the stalks about an inch above the bulbs and trim the roots to a neat quarter-inch. Store the cured garlic in mesh bags, old pantyhose, or slatted crates, keeping them in a cool, dark, and dry place such as a pantry or basement. Properly dried and cured garlic can last up to six months, providing you with fresh, homegrown flavor well into winter.
Storing Homegrown Garlic

To ensure your homegrown garlic stays fresh and usable for months, it is crucial to store it properly. Start by choosing the best storage methods such as hanging the garlic bulbs in a well-ventilated area or placing them in mesh bags. These techniques help maintain airflow, which is vital for preventing mold. Ensure that the storage environment is cool, around 60 to 65 degrees Fahrenheit, with low humidity to also avoid sprouting and decay.
For optimal storage conditions, avoid storing garlic in the refrigerator, as the moisture can promote mold growth and degrade the quality. Instead, opt for a dark, dry place like a pantry or cupboard where the garlic is protected from direct sunlight. These conditions not only preserve the garlic's flavor but also extend its shelf life significantly, giving you fresh cloves for cooking throughout the year.
Using Fresh Garlic in Cooking

For enhancing your dishes with fresh garlic, consider using minced garlic to release its full flavor in sauces, stir-fries, and marinades. Minced garlic blends seamlessly into dishes, offering a robust and evenly distributed taste. For a more intense aroma, use crushed garlic; it's perfect for dressings, dips, and spreads.
Roasting garlic transforms its sharpness into a mellow, caramelized sweetness ideal for soups, stews, and roasted vegetables. Roasted garlic can be spread onto bread or mixed into mashed potatoes for a rich, buttery flavor. This method mellows the garlic, making it palatable even for those who find raw garlic too pungent.
Experiment with fresh garlic forms to diversify your culinary repertoire. Add whole garlic cloves to braised dishes for a subtle infusion, or slice garlic thinly for sautés and garnishes. Fresh garlic enhances the complexity of any dish, making it a versatile staple in your kitchen.
Common Mistakes to Avoid

Many beginners make the mistake of overwatering garlic, which leads to waterlogged soil and root rot. Ensuring proper drainage and allowing the topsoil to dry out slightly between waterings can prevent this issue. Another common error is planting cloves too deep or too shallow; planting cloves 1-2 inches deep is ideal for proper root and bulb development. Additionally, neglecting soil quality by not testing pH levels or adding necessary nutrients can result in poor garlic growth.
Addressing these pitfalls with simple solutions can make all the difference for a successful garlic harvest. Using raised beds with well-drained soil reduces the risk of waterlogging, while spacing cloves correctly 4-6 inches apart ensures optimal growth. Regularly checking soil pH and amending with compost or organic matter keeps the environment conducive for healthy garlic plants. By avoiding these common mistakes, gardeners can expect a bountiful and robust garlic harvest.
Benefits of Growing Your Own Garlic

Growing your own garlic offers numerous health benefits, as it is rich in essential nutrients like vitamins B6 and C, manganese, and selenium. Fresh garlic enhances immune function, reduces blood pressure, and improves cholesterol levels, promoting overall well-being. Moreover, cultivating garlic at home ensures that you consume chemical-free and organic produce, contributing positively to your health and the environment.
From an environmental and economic perspective, growing garlic is highly advantageous. It reduces your dependency on commercially farmed garlic, which often has a significant carbon footprint due to transportation. Home gardening also offers cost savings by cutting down on grocery bills, as garlic can be stored for months. Additionally, garlic acts as a natural pest repellent in gardens, creating a more sustainable and eco-friendly growing environment.
Advanced Tips for Garlic Growers

Experienced garlic growers can experiment with interplanting garlic with compatible crops like carrots and tomatoes to maximize garden space and deter pests. To optimize bulb size, it's crucial to use high-quality seed stock and practice crop rotation. Growing organic garlic requires attention to soil fertility; enhancing it with organic matter like aged compost and green manures can improve yields and bulb quality. By employing these advanced techniques, you can achieve a robust and bountiful garlic harvest.
Troubleshooting Garlic Growing Problems

Garlic plants can encounter several growing issues, but knowing how to troubleshoot them can ensure a bountiful harvest. Yellowing leaves often indicate nitrogen deficiency, so incorporating a balanced fertilizer or compost can help. Stunted growth may be caused by poor soil drainage; thus, ensure your soil is well-draining and amend with organic matter if necessary. Pay attention to garlic rust, characterized by orange spots on leaves, which can be mitigated by improving air circulation and using fungicides. Addressing these problems promptly can lead to healthy garlic plants.
Conclusion: Enjoying Your Garlic Harvest

Savor the rewards of your labor by appreciating the rich flavors of your homegrown garlic. Delight in the satisfaction of knowing you've cultivated this versatile ingredient right in your own garden. Share your garlic harvest with family and friends, enhancing their culinary experiences as well. Keep the cycle going by saving some of your best bulbs for next year's planting. Finally, embrace the continuous journey of gardening, always learning and improving with each season.
Meta Description: Learn how to grow garlic at home with this comprehensive beginner's guide, covering everything from planting to harvesting your garlic.
Meta Keywords: how to grow garlic, growing garlic, planting garlic, garlic varieties, garlic pests, harvesting garlic
Sources:
https://www.almanac.com
https://www.gardeners.com
https://www.organicgardening.com
https://www.extension.umn.edu
https://www.motherearthnews.com